之前使用二进制Hard-Way模式搭建了Kubernetes三节点集群,今天采用Kubeadm 来快速搭建Kubernetes V1.16.8集群。
环境准备
本地需要准备以下软件和环境:
- 8G以上内存(最好12G以上)
- Vagrant 2.2.4
- VirtualBox 5.2.36
- Mac / Linux
- 虚拟机:Centos 7
其中Centos 7由本人通过Vagrant工具定制,禁用了防火墙,SELINUX,以及一些内核参数等等,方便快速启动符合要求的集群环境。如何使用Vagrant搭建集群,可以参考:Vagrant搭建虚拟机集群
集群准备
我们使用Vagrant和Virtualbox安装包含3个节点的kubernetes集群。
| IP | 主机名 | 组件 |
|---|---|---|
| 192.168.56.101 | node1 | kube-apiserver、kube-controller-manager、kube-scheduler、kubelet、etcd、corecdn、dashboard |
| 192.168.56.102 | node2 | kube-apiserver、kube-controller-manager、kube-scheduler、kubelet、etcd |
| 192.168.56.103 | node3 | kubelet |
注意:以上的IP、主机名和组件都是固定在这些节点的,即使销毁后下次使用vagrant重建依然保持不变。
主要组件版本
| 组件 | 版本 |
|---|---|
| kubernetes | 1.16.8 |
| etcd | 3.3.15-0 |
| coredns | 1.6.2 |
| Flanneld | 0.11.0 |
| Docker | 18.09.9 |
插件
- Dashboard
- Prometheus(待安装)
- ELK (elasticsearch、fluentd、kibana)(待安装)
基础组件安装
Docker安装
需要在每个node节点上执行:
yum install -y yum-utils device-mapper-persistent-data lvm2

yum-config-manager --add-repo https://download.docker.com/linux/centos/docker-ce.repo

# yum list docker-ce --showduplicates | sort -r

yum install docker-ce-18.09.9

mkdir -p /etc/docker

cat > /etc/docker/daemon.json <<EOF
{
  "registry-mirrors" : [
    "https://docker.mirrors.ustc.edu.cn",
    "https://hub-mirror.c.163.com"
  ]
}
EOF

systemctl start docker
systemctl enable docker
修改cgroup驱动为systemd:
docker info | grep Cgroup

vi /usr/lib/systemd/system/docker.service

# 修改为如下所示:
# ExecStart=/usr/bin/dockerd -H fd:// --containerd=/run/containerd/containerd.sock --exec-opt native.cgroupdriver=systemd

systemctl daemon-reload
systemctl restart docker
Kubeadm等组件安装
每个node节点都需要执行:
cat <<EOF > /etc/yum.repos.d/kubernetes.repo
[kubernetes]
name=Kubernetes
baseurl=http://mirrors.aliyun.com/kubernetes/yum/repos/kubernetes-el7-x86_64
enabled=1
gpgcheck=0
repo_gpgcheck=0
gpgkey=http://mirrors.aliyun.com/kubernetes/yum/doc/yum-key.gpg
        http://mirrors.aliyun.com/kubernetes/yum/doc/rpm-package-key.gpg
EOF
安装V1.16.8版本的kubeadm工具:
# --disableexcludes 禁掉除了kubernetes之外的别的仓库
yum install -y kubelet-1.16.8 kubeadm-1.16.8 kubectl-1.16.8 --disableexcludes=kubernetes

# 查看安装结果
# kubeadm version

# 将 kubelet 设置成开机启动并现在立刻启动
systemctl enable --now kubelet
初始化集群
在 master 节点配置 kubeadm 初始化文件,可以通过如下命令导出默认的初始化配置:
kubeadm config print init-defaults > kubeadm-init.yaml
然后根据我们自己的需求修改配置,比如修改 imageRepository 的值,kube-proxy 的模式为 ipvs,另外需要注意的是我们这里是准备安装 flannel 网络插件的,需要将 networking.podSubnet 设置为10.244.0.0/16:
apiVersion: kubeadm.k8s.io/v1beta2
bootstrapTokens:
  - groups:
      - system:bootstrappers:kubeadm:default-node-token
    token: abcdef.0123456789abcdef
    ttl: 24h0m0s
    usages:
      - signing
      - authentication
kind: InitConfiguration
localAPIEndpoint:
  advertiseAddress: 192.168.56.101   # apiserver 节点内网IP
  bindPort: 6443
nodeRegistration:
  criSocket: /var/run/dockershim.sock
  name: node1   # 默认读取当前master节点的hostname
  taints:
    - effect: NoSchedule
      key: node-role.kubernetes.io/master
---
apiServer:
  timeoutForControlPlane: 4m0s
apiVersion: kubeadm.k8s.io/v1beta2
certificatesDir: /etc/kubernetes/pki
clusterName: kubernetes
controlPlaneEndpoint: "192.168.56.101:6443"
controllerManager: {}
dns:
  type: CoreDNS
etcd:
  local:
    dataDir: /var/lib/etcd
#imageRepository: ccr.ccs.tencentyun.com/tke_google_containers  # 修改成自己的镜像源
imageRepository: registry.cn-hangzhou.aliyuncs.com/google_containers # 指定镜像源为阿里源
kind: ClusterConfiguration
kubernetesVersion: v1.16.8
networking:
  dnsDomain: cluster.local
  podSubnet: 10.244.0.0/16  # Pod 网段,flannel插件需要使用这个网段
  serviceSubnet: 10.96.0.0/12
scheduler: {}
---
apiVersion: kubeproxy.config.k8s.io/v1alpha1
kind: KubeProxyConfiguration
mode: ipvs  # kube-proxy 模式
然后执行初始化:
[root@node1 kubernetes]# kubeadm init --config kubeadm-init.yaml
[init] Using Kubernetes version: v1.16.8
[preflight] Running pre-flight checks
[preflight] Pulling images required for setting up a Kubernetes cluster
[preflight] This might take a minute or two, depending on the speed of your internet connection
[preflight] You can also perform this action in beforehand using 'kubeadm config images pull'
[kubelet-start] Writing kubelet environment file with flags to file "/var/lib/kubelet/kubeadm-flags.env"
[kubelet-start] Writing kubelet configuration to file "/var/lib/kubelet/config.yaml"
[kubelet-start] Activating the kubelet service
[certs] Using certificateDir folder "/etc/kubernetes/pki"
[certs] Generating "ca" certificate and key
[certs] Generating "apiserver" certificate and key
[certs] apiserver serving cert is signed for DNS names [node1 kubernetes kubernetes.default kubernetes.default.svc kubernetes.default.svc.cluster.local] and IPs [10.96.0.1 192.168.56.101 192.168.56.101]
[certs] Generating "apiserver-kubelet-client" certificate and key
[certs] Generating "front-proxy-ca" certificate and key
[certs] Generating "front-proxy-client" certificate and key
[certs] Generating "etcd/ca" certificate and key
[certs] Generating "etcd/server" certificate and key
[certs] etcd/server serving cert is signed for DNS names [node1 localhost] and IPs [192.168.56.101 127.0.0.1 ::1]
[certs] Generating "etcd/peer" certificate and key
[certs] etcd/peer serving cert is signed for DNS names [node1 localhost] and IPs [192.168.56.101 127.0.0.1 ::1]
[certs] Generating "etcd/healthcheck-client" certificate and key
[certs] Generating "apiserver-etcd-client" certificate and key
[certs] Generating "sa" key and public key
[kubeconfig] Using kubeconfig folder "/etc/kubernetes"
[kubeconfig] Writing "admin.conf" kubeconfig file
[kubeconfig] Writing "kubelet.conf" kubeconfig file
[kubeconfig] Writing "controller-manager.conf" kubeconfig file
[kubeconfig] Writing "scheduler.conf" kubeconfig file
[control-plane] Using manifest folder "/etc/kubernetes/manifests"
[control-plane] Creating static Pod manifest for "kube-apiserver"
[control-plane] Creating static Pod manifest for "kube-controller-manager"
[control-plane] Creating static Pod manifest for "kube-scheduler"
[etcd] Creating static Pod manifest for local etcd in "/etc/kubernetes/manifests"
[wait-control-plane] Waiting for the kubelet to boot up the control plane as static Pods from directory "/etc/kubernetes/manifests". This can take up to 4m0s
[apiclient] All control plane components are healthy after 20.003595 seconds
[upload-config] Storing the configuration used in ConfigMap "kubeadm-config" in the "kube-system" Namespace
[kubelet] Creating a ConfigMap "kubelet-config-1.16" in namespace kube-system with the configuration for the kubelets in the cluster
[upload-certs] Skipping phase. Please see --upload-certs
[mark-control-plane] Marking the node node1 as control-plane by adding the label "node-role.kubernetes.io/master=''"
[mark-control-plane] Marking the node node1 as control-plane by adding the taints [node-role.kubernetes.io/master:NoSchedule]
[bootstrap-token] Using token: abcdef.0123456789abcdef
[bootstrap-token] Configuring bootstrap tokens, cluster-info ConfigMap, RBAC Roles
[bootstrap-token] configured RBAC rules to allow Node Bootstrap tokens to post CSRs in order for nodes to get long term certificate credentials
[bootstrap-token] configured RBAC rules to allow the csrapprover controller automatically approve CSRs from a Node Bootstrap Token
[bootstrap-token] configured RBAC rules to allow certificate rotation for all node client certificates in the cluster
[bootstrap-token] Creating the "cluster-info" ConfigMap in the "kube-public" namespace
[addons] Applied essential addon: CoreDNS
[addons] Applied essential addon: kube-proxy

Your Kubernetes control-plane has initialized successfully!

To start using your cluster, you need to run the following as a regular user:

  mkdir -p $HOME/.kube
  sudo cp -i /etc/kubernetes/admin.conf $HOME/.kube/config
  sudo chown $(id -u):$(id -g) $HOME/.kube/config

You should now deploy a pod network to the cluster.
Run "kubectl apply -f [podnetwork].yaml" with one of the options listed at:
  https://kubernetes.io/docs/concepts/cluster-administration/addons/

You can now join any number of control-plane nodes by copying certificate authorities
and service account keys on each node and then running the following as root:

  kubeadm join 192.168.56.101:6443 --token abcdef.0123456789abcdef \
    --discovery-token-ca-cert-hash sha256:4ca68042acf53047772dc21e036c130692c3b140262d751adbe438aefd85fc3a \
    --control-plane

Then you can join any number of worker nodes by running the following on each as root:

kubeadm join 192.168.56.101:6443 --token abcdef.0123456789abcdef \
    --discovery-token-ca-cert-hash sha256:4ca68042acf53047772dc21e036c130692c3b140262d751adbe438aefd85fc3a
拷贝 kubeconfig 文件:
mkdir -p $HOME/.kube
sudo cp -i /etc/kubernetes/admin.conf $HOME/.kube/config
sudo chown $(id -u):$(id -g) $HOME/.kube/config
添加节点
记住初始化集群上面的配置和操作要提前做好,将 master 节点上面的 $HOME/.kube/config 文件拷贝到 node 节点对应的文件中,安装 kubeadm、kubelet、kubectl(可选),然后执行上面初始化完成后提示的 join 命令即可。
添加master节点
# 拷贝证书,在node1 master节点执行
ssh root@node2 "mkdir -p /etc/kubernetes/pki/etcd"
scp /etc/kubernetes/pki/ca.* root@node2:/etc/kubernetes/pki/
scp /etc/kubernetes/pki/sa.* root@node2:/etc/kubernetes/pki/
scp /etc/kubernetes/pki/front-proxy-ca.* root@node2:/etc/kubernetes/pki/
scp /etc/kubernetes/pki/etcd/ca.* root@node2:/etc/kubernetes/pki/etcd/
scp /etc/kubernetes/admin.conf root@node2:/etc/kubernetes/

# 执行join命令,注意是在node2节点执行
kubeadm join 192.168.56.101:6443 --token abcdef.0123456789abcdef \
    --discovery-token-ca-cert-hash sha256:4ca68042acf53047772dc21e036c130692c3b140262d751adbe438aefd85fc3a \
    --control-plane
添加Worker节点
# 在node3节点执行
kubeadm join 192.168.56.101:6443 --token abcdef.0123456789abcdef \
    --discovery-token-ca-cert-hash sha256:4ca68042acf53047772dc21e036c130692c3b140262d751adbe438aefd85fc3a
如果忘记了上面的 join 命令或者旧的token过期,可以使用命令
kubeadm token create --print-join-command重新获取。
执行成功后运行 get nodes 命令:
$ kubectl get nodes
NAME          STATUS     ROLES    AGE    VERSION
node1   			NotReady   master   5m    v1.16.8
node2    			NotReady   master   30s   v1.16.8
node2    			NotReady   <none>   10s   v1.16.8
可以看到是 NotReady 状态,这是因为还没有安装网络插件,接下来安装网络插件:
$ wget https://raw.githubusercontent.com/coreos/flannel/2140ac876ef134e0ed5af15c65e414cf26827915/Documentation/kube-flannel.yml

# 因为有节点是多网卡,所以需要在资源清单文件中指定内网网卡
# 搜索到名为 kube-flannel-ds-amd64 的 DaemonSet,在kube-flannel容器下面
$ vi kube-flannel.yml
......
containers:
- name: kube-flannel
  image: quay.io/coreos/flannel:v0.11.0-amd64
  command:
  - /opt/bin/flanneld
  args:
  - --ip-masq
  - --kube-subnet-mgr
  - --iface=eth0  # 如果是多网卡的话,指定内网网卡的名称
......
$ kubectl apply -f kube-flannel.yml  # 安装 flannel 网络插件
稍等片刻,查看状态:
[root@node1 kubernetes]# kubectl get node -o wide
NAME    STATUS   ROLES    AGE   VERSION   INTERNAL-IP      EXTERNAL-IP   OS-IMAGE                KERNEL-VERSION                CONTAINER-RUNTIME
node1   Ready    master   9h    v1.16.8   192.168.56.101   <none>        CentOS Linux 7 (Core)   4.4.214-1.el7.elrepo.x86_64   docker://18.9.9
node2   Ready    master   9h    v1.16.8   192.168.56.102   <none>        CentOS Linux 7 (Core)   4.4.214-1.el7.elrepo.x86_64   docker://18.9.9
node3   Ready    <none>   9h    v1.16.8   192.168.56.103   <none>        CentOS Linux 7 (Core)   4.4.214-1.el7.elrepo.x86_64   docker://18.9.9
关于Flannel网络插件:
当我们部署完网络插件后执行 ifconfig 命令,正常会看到新增的
cni0与flannel1这两个虚拟设备,但是如果没有看到cni0这个设备也不用太担心,我们可以观察/var/lib/cni目录是否存在,如果不存在并不是说部署有问题,而是该节点上暂时还没有应用运行,我们只需要在该节点上运行一个 Pod 就可以看到该目录会被创建,并且cni0设备也会被创建出来。
Dashboard
安装最新的 2.0+ 版本的 Dashboard:
wget https://raw.githubusercontent.com/kubernetes/dashboard/v2.0.0-beta5/aio/deploy/recommended.yaml

kubectl apply -f recommended.yaml
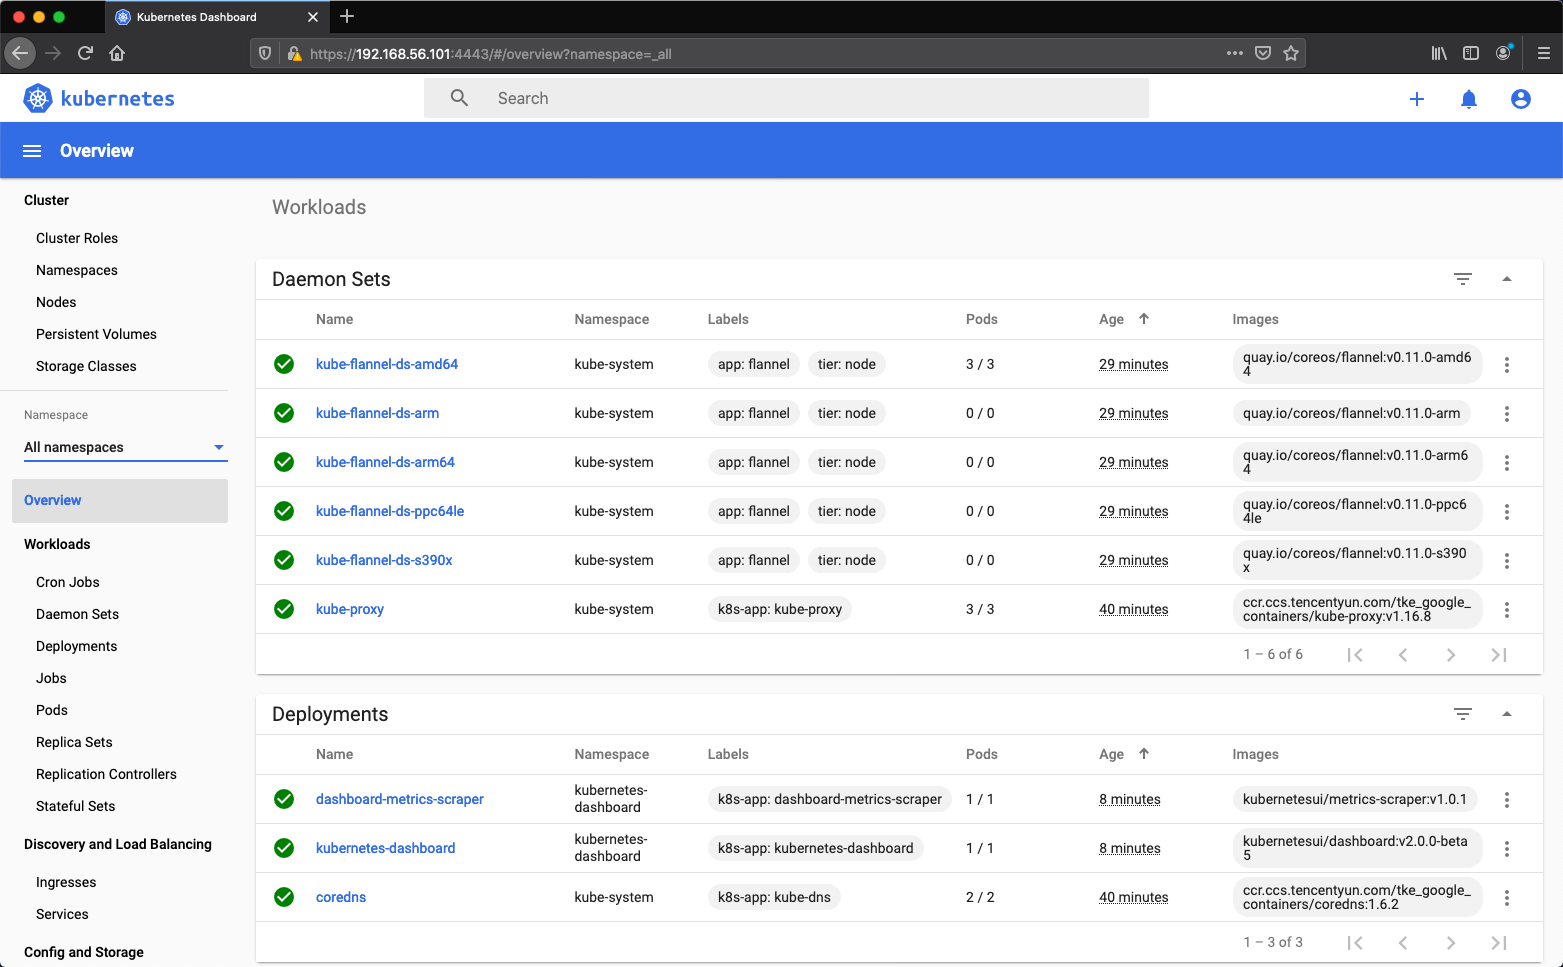
新版本的 Dashboard 会被默认安装在 kubernetes-dashboard 这个命名空间下面:
[root@node1 kubernetes]# kubectl get pods -n kubernetes-dashboard
NAME                                         READY   STATUS    RESTARTS   AGE
dashboard-metrics-scraper-76585494d8-nhmg5   1/1     Running   0          9h
kubernetes-dashboard-6b86b44f87-zdts4        1/1     Running   1          9h
使用kubectl port-forward命令转发到本地4443端口进行访问,接下来就可以通过Firefox中访问192.168.56.101:4443。
这时候创建一个具有全局所有权限的用户来登录Dashboard:(dashboard-admin.yaml)
kind: ClusterRoleBinding
apiVersion: rbac.authorization.k8s.io/v1beta1
metadata:
  name: dashboard-admin
  annotations:
    rbac.authorization.kubernetes.io/autoupdate: "true"
roleRef:
  kind: ClusterRole
  name: cluster-admin
  apiGroup: rbac.authorization.k8s.io
subjects:
  - kind: ServiceAccount
    name: dashboard-admin
    namespace: kubernetes-dashboard

---
apiVersion: v1
kind: ServiceAccount
metadata:
  name: dashboard-admin
  namespace: kubernetes-dashboard
直接创建:
# 创建权限用户
kubectl apply -f dashboard-admin.yaml

# 获取token
ADMIN_SECRET=$(kubectl get secrets -n kubernetes-dashboard | grep dashboard-admin-token | awk '{print $1}')
DASHBOARD_LOGIN_TOKEN=$(kubectl describe secret -n kubernetes-dashboard ${ADMIN_SECRET} | grep -E '^token' | awk '{print $2}')
echo ${DASHBOARD_LOGIN_TOKEN}
然后用上面打印在控制台的字符串作为 token 登录 Dashboard 即可:
清理
如果你的集群安装过程中遇到了其他问题,我们可以使用下面的命令来进行重置:
kubeadm reset
ifconfig cni0 down && ip link delete cni0
ifconfig flannel.1 down && ip link delete flannel.1
rm -rf /var/lib/cni/
「真诚赞赏,手留余香」
请我喝杯咖啡?
使用微信扫描二维码完成支付